A\P Scan Program 06/03/2011 9:45 am Help Derek , Copyright © 201 1, Roughneck Systems Inc.
To scan images and add an A\P Invoice:
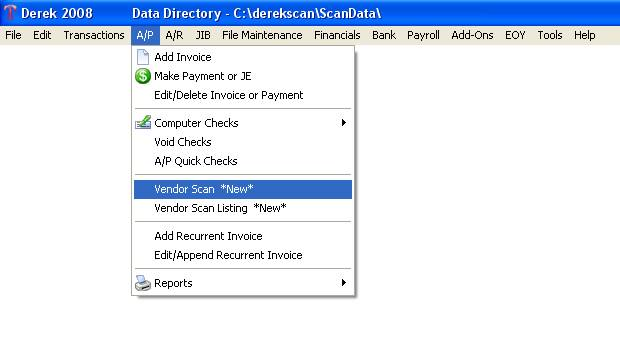
Select A\P from the tool bar and choose "Vendor Scan".
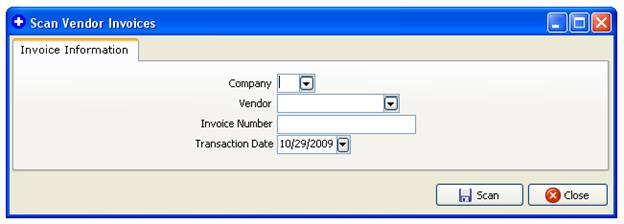
Add the information into the requested fields and click scan.
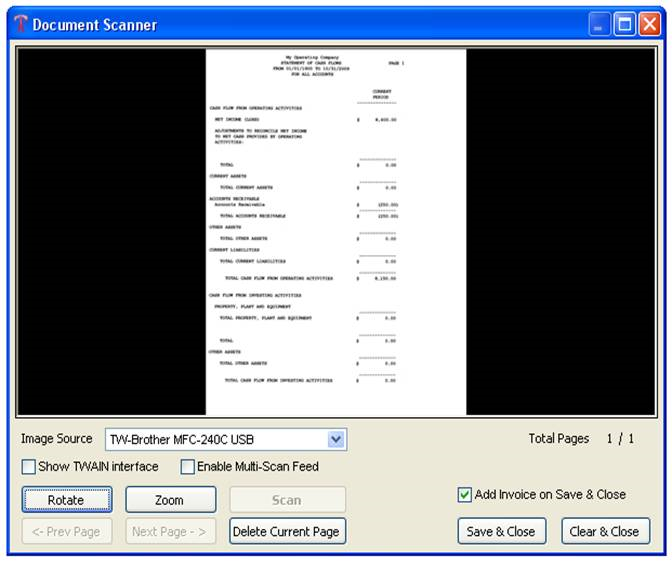
Once you're in the Document Scanner area, you have a choice to select "Add invoice on Save and Close". If you choose this option, you will be allowed to add the invoice once the document is scanned. If you do not want to add an A\P invoice in the A\P program, rather just the image, then leave that option unchecked.
If you select to not add the "Add invoice on Save and Close" at the time the document is scanned, you can always add the invoice at a later date into the A\P program. As long as the invoice you add in has the same Transaction date as the scanned document, they will automatically attach themselves to one another.
After you determine your filter for the Document Scanner screen, click on "Scan". Your document will scan ands when finished you will see the interface for your scanning equipment. At that time you should be able to accept the image or start again.
If you like the image, accept it and you will be taken back to the Document Scanner screen.
Select "Save and Close". If you chose to have the "Add invoice on Save and Close" option then at this time the Add A\P screen will appear. Add the invoice as normal, and Save and Close.
Document is now scanned and can be viewed.
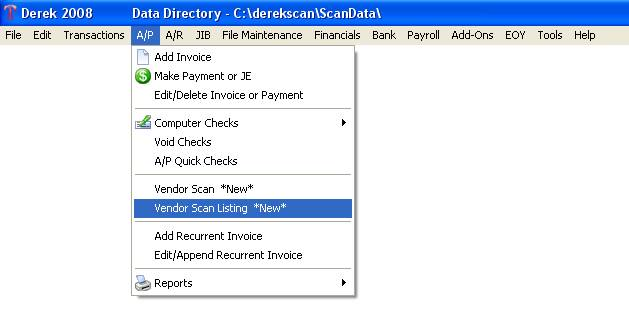
To view the saved document, go to A\P, "Vendor Scan Listing". Set your filter and click on "Get Data". Select the "View Print" button to see the scanned image.
If you selected "Add invoice on Save and Close" then you can also view the invoice and the scanned document by going to A\P, Edit\Delete Invoice or Payment. Set your filter to find the added invoice. Highlight it and click "View". Your scanned image should appear.
To scan images and NOT add an A\P invoice:
Select A\P from the tool bar and choose "Vendor Scan".
Add the information into the requested fields and click Scan.
Once you're in the Document Scanner area, do not check mark the option to select "Add invoice on Save and Close".
If you select to not add the "Add invoice on Save and Close" at the time the document is scanned, you can always add the invoice at a later date into the A\P program. As long as the invoice you add in has the same Transaction date as the scanned document, they will automatically attach themselves to one another.
After you determine your filter for the Document Scanner screen, click on "Scan". Your document will scan and when finished you will see the interface for your scanning equipment. At that time you should be able to accept the image or start again.
If you like the image, accept it and you will be taken back to the Document Scanner screen. Select "Save and Close".
Document is now scanned and saved and can be viewed.
To view the scanned document, go to A\P, "Vendor Scan Listing". Set your filter and click on "Get Data". Select the "View Print" button to see the scanned image.
Created with the Personal Edition of HelpNDoc: What is a Help Authoring tool?


