Printing Computer Checks for Accounts Payable
Process to Print Computer Generated Checks for A/P Invoices.
1) Prepare Computer Checks - which Invoice(s) to pay and how much.
2) Verify your payments.
3) Print the Check(s).
4) Updates the files for the checks.
TUTORIAL SCENARIO
We will prepare and print a computer check for the Invoice we entered earlier in the Tutorial. Once again, the dates may differ.
PREPARE COMPUTER GENERATED A/P CHECKS:
From the Drop Down Menu, select A/P - Computer Printed Checks - Prepare Computer Checks.
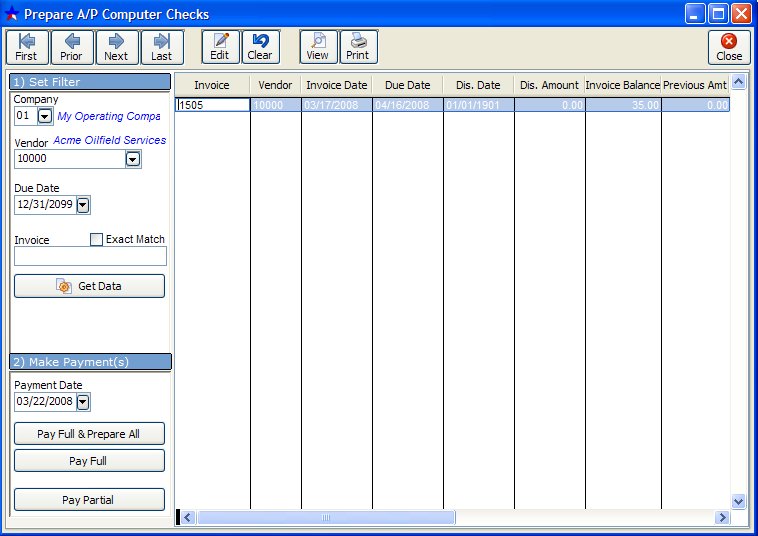
Enter Company Number and Vendor Number, then click Get Data.
Click Pay Partial.
Enter amount of the payment.
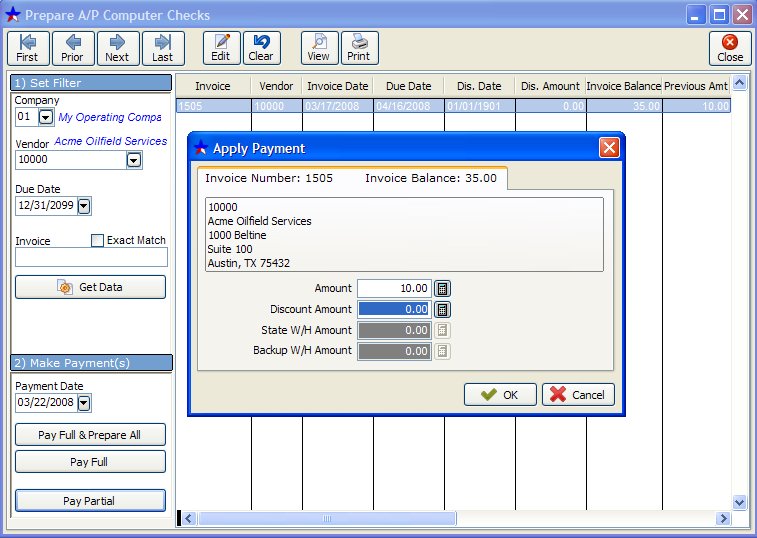
Click Ok.
VERIFY THE PREPARATION OF PAYMENTS
Normally you will be entering more than one payment at a time and would want to verify your entries before printing the Checks. To do this, Print a List of the Prepared Checks/Payments by clicking the 'Print' Tab at the top of the Prepare A/P Computer Checks. To make changes to the list, use the Edit or Delete buttons as desired.
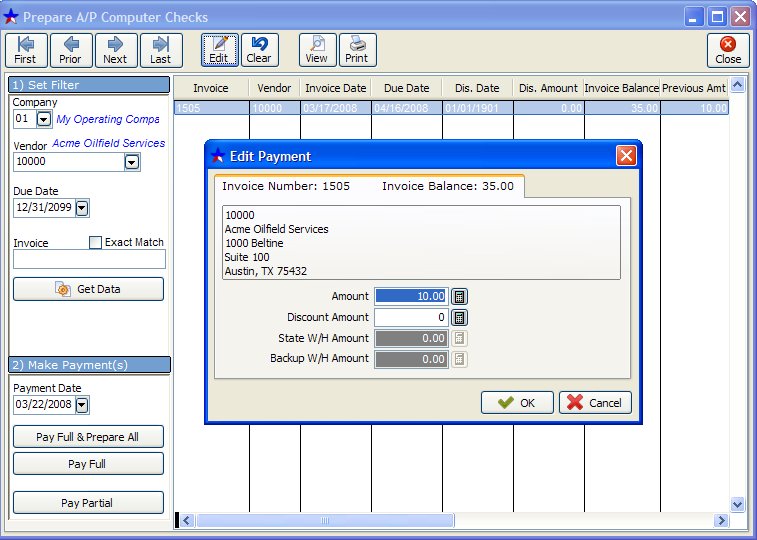
From the Drop Down Menu, select A/P - Computer Printed Checks - Prepare Computer Checks, enter in the Company number, Vendor and click on Get Data. Select (click on) the correct invoice then click on the Edit button. This will pull up your Edit Payment screen. This is where you can edit the payment you just made, if needed.
PRINT THE PREPARED COMPUTER A/P CHECKS
From the Drop Down Menu, select A/P - Computer Checks - Print Checks.
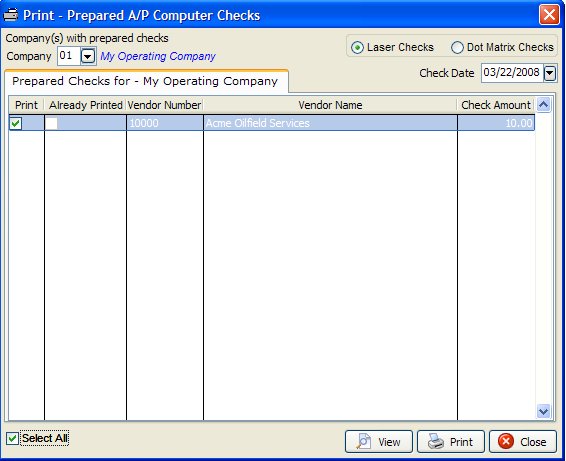
Enter in your Company number, select Laser Checks or Dot Matrix Checks and enter in the date you want to print on the checks. A listing of prepared checks will appear, you can put a check mark next to each check you would like to print. If you would like to print all checks that were prepared click on the 'Select All' option at the bottom of the screen. You have the option to View the prepared checks.
It is assumed checks are numbered sequentially. The Print Check Register option appears after you finish printing checks. It's always good to save a copy of this Register for your records.
UPDATE THE FILES FOR THE CHECK
After printing the check(s) be sure to run this program to update the files. This program is run separately from the actual check printing in case you made a mistake or your printer fails during printing. You can reprint the checks any time prior to running the update.
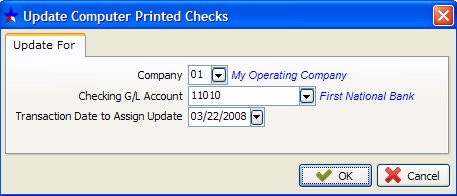
Enter 11010 for the Checking Account GL Number as shown above. Note: GL Number 21000 is hard coded for Accounts Payable. Derek will make an automatic Debit to that GL Number for Accounts Payable checks. See GL Number Restrictions.
Click OK. After the Update completes you are Finished!
Reports To Verify Computer Checks
A/P Inquiry Report - should show the payment listed below the Invoice. The Invoice Balance should be reduced by the amount of the payment.
Monthly Transaction Listing - should show a debit to Accounts Payable (G/L Number 21000) and a credit to the Cash Account you specified.
Check Listing Report - should show a list of the computer checks you posted against the cash account.
Related Topics
Accounting for Dummies ~ GL Number Restrictions
Created with the Personal Edition of HelpNDoc: What is a Help Authoring tool?


